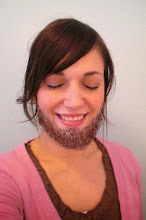
Three cheers for our first fleece project! I know, I'm late. But it was too dark yesterday to take decent pictures. So without further ado...  THE BOA SCARF
 THE BOA SCARF
This is so easy to make! You'll need:
- about a yard of anti-pill fleece
(more or less depending on who you're making it for) - basic sewing supplies
- a sewing machine
- a comfy couch + good movie
 * Start by cutting three - 4" strips along the length of your fleece. These cuts should run PARALLEL to the selvedge edge. This means that however long you want the scarf, that's how much fabric you'll buy. (for example: If you buy one yard of fabric, your scarf will be 36" long) 40" is a good starting point for a child's scarf. Add more inches for an older child, subtract for younger, etc. You'll want this to be a generous scarf so they can wrap and wrap and wrap.
 * Stack the three strips on top of each other and pin.
 * With a fabric pen, mark a line down the center of the scarf.
This is line will be your stitching line. Sew the three layers together.
Make sure you adjust your stitch length on your machine to be longer, since fleece is so thick. You may also want to lessen the pressure on your pressure foot, if you know how.
* Now you'll want to cozy up on the couch with your redbox copy of The Proposal and a decent amount of chocolate. (Didn't I mention that in the supplies list?)
If you are doing multiple scarves, sew them all first, then do this next part all at once.
 Cut all the layers into about 1/2" strips. Cut up to the stitching but be careful NOT to cut through it.
 (You're scarf will be very short.)
 Now it looks good but we can make it even cuter.
 One by one, grasp each strand at the base. Applying just a hint of pressure, let the strip run through your fingers and snap back into place. You can do this rapid fire, it doesn't have to be perfect or methodical. And you will get a good amount of fluffy lint up your nose.
 Now it looks good but we can make it even cuter.
 One by one, grasp each strand at the base. Applying just a hint of pressure, let the strip run through your fingers and snap back into place. You can do this rapid fire, it doesn't have to be perfect or methodical. And you will get a good amount of fluffy lint up your nose.
A beautiful, luxurious scarf in no time. Wrap this up, put it under the tree of a special little girl, and I guarantee she will put it on immediately, and leave it on until May.
Play around with different colors of fleece to make something truly one-of-a-kind.
More fleece projects to come! I'll be checking in later.
And please don't hesitate to email me pictures of your creation.


So fun! I wish Chloe was older so I could make one for her for Christmas. Maybe next year. Keep posting, the class is listening.
ReplyDelete